Acrylic Nails on Short Bitten Nails: The Ultimate Guide
Struggling with short, bitten nails but dreaming of long, glamorous acrylics? You’re not alone! Many people with nail-biting habits feel self-conscious about their hands and believe acrylics are out of reach. However, acrylic nails *are* absolutely possible, and can even be beneficial, for those with short, bitten nails. This comprehensive guide will walk you through everything you need to know, from preparation and application to aftercare and maintenance, ensuring you achieve a stunning and durable manicure. We’ll delve into techniques specifically designed for short nail beds, explore the best products, and address common concerns. Prepare to transform your nails and regain your confidence!
Understanding Acrylic Nails and Nail Biting
Let’s start with the basics. Acrylic nails are artificial enhancements placed over natural nails. They consist of a liquid monomer and a powder polymer, which, when combined, create a hard, durable layer that can be shaped and sculpted. For individuals with nail-biting habits (onychophagia), the prospect of acrylics offers more than just aesthetic appeal; it can be a crucial step towards breaking the cycle of biting.
Nail biting can stem from various factors, including stress, anxiety, boredom, or even habit. It often leads to short, uneven nail beds, damaged cuticles, and increased risk of infection. While acrylics won’t magically cure nail biting, they provide a protective barrier that makes it physically more difficult to bite. Furthermore, the visual appeal of well-manicured acrylics can serve as a powerful motivator to stop biting and maintain healthy nail growth.
The Challenges of Applying Acrylics to Short, Bitten Nails
Applying acrylics to short, bitten nails presents unique challenges compared to working with longer, healthier nails. Some key considerations include:
- Limited Surface Area: Short nail beds offer less surface area for the acrylic to adhere to, potentially compromising the strength and longevity of the manicure.
- Proximity to Skin: The close proximity of the acrylic to the surrounding skin increases the risk of irritation or allergic reactions.
- Uneven Nail Beds: Nail biting often results in uneven nail beds, which can make it difficult to create a smooth and symmetrical acrylic application.
- Weakened Natural Nails: Constant biting weakens the natural nails, making them more susceptible to damage from the acrylic application process.
Despite these challenges, successful acrylic application on short, bitten nails is entirely achievable with the right techniques, products, and aftercare.
Preparing Short, Bitten Nails for Acrylics: A Crucial First Step
Proper preparation is paramount for ensuring the success of your acrylic manicure. This involves several key steps:
- Gentle Cleaning and Sanitizing: Thoroughly wash your hands with a mild soap and water. Use a nail brush to gently scrub away any dirt or debris from under the nails and around the cuticles. Sanitize your hands and nails with an alcohol-based cleanser to prevent infection.
- Cuticle Care: Gently push back your cuticles using a cuticle pusher. Avoid cutting your cuticles, as this can increase the risk of infection. If necessary, use a cuticle nipper to carefully trim any hangnails or loose skin around the nails.
- Buffing and Shaping: Gently buff the surface of your natural nails to remove any shine and create a slightly rough texture for better acrylic adhesion. Shape your nails with a fine-grit nail file, creating a smooth and even surface. If your nails are extremely short, focus on creating a rounded or oval shape to maximize the surface area for the acrylic.
- Dehydration: Apply a nail dehydrator to remove any excess oil or moisture from the nail surface. This is crucial for preventing lifting and ensuring long-lasting adhesion.
- Primer Application: Apply a thin layer of acid-free nail primer to your natural nails. The primer acts as a bonding agent, further enhancing the adhesion of the acrylic.
Important Note: If your nails are severely damaged or infected, it’s best to consult with a dermatologist or nail technician before proceeding with acrylic application. Addressing any underlying nail health issues is essential for preventing further complications.
Acrylic Application Techniques for Short Nail Beds
Applying acrylics to short, bitten nails requires a slightly different approach than applying them to longer nails. Here are some key techniques to keep in mind:
Choosing the Right Acrylic System
Select a high-quality acrylic system specifically designed for beginners or those with short nails. Look for systems that offer good adhesion, easy workability, and minimal odor. Consider using a slow-setting acrylic powder, which will give you more time to sculpt and shape the nails before it hardens.
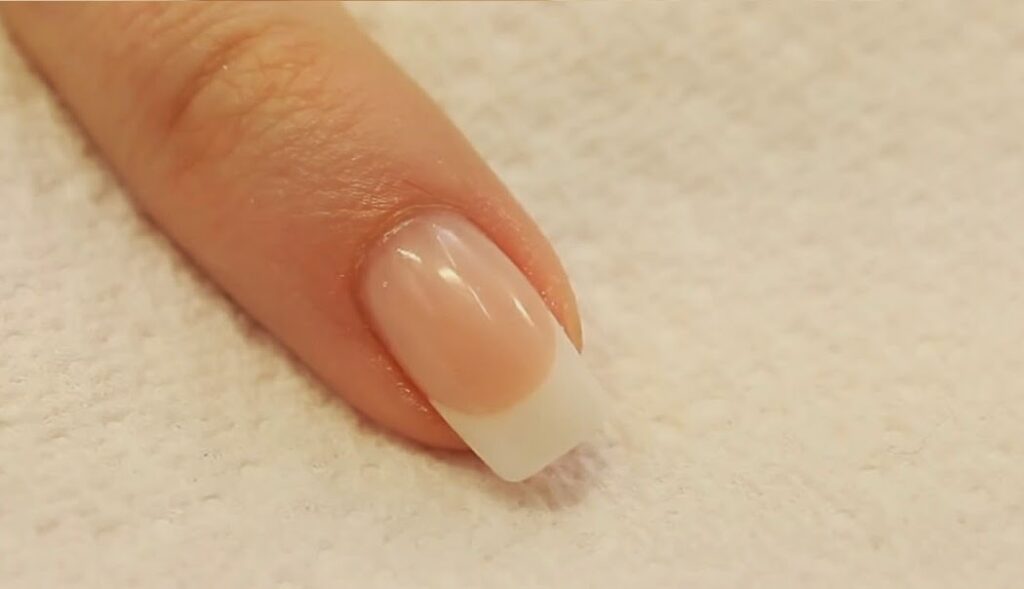
Using Nail Forms or Tips
Nail forms are paper or plastic guides that are placed under the natural nail to create an extension. They are a good option for creating a customized shape and length. Nail tips are pre-shaped plastic extensions that are glued onto the natural nail. They can be a quicker and easier option for adding length, but it’s important to choose tips that fit your natural nail shape properly. For short, bitten nails, opt for short or extra-short tips to avoid creating excessive length that could be prone to breakage.
Application Process: Step-by-Step Guide
- Apply Nail Forms or Tips: If using nail forms, carefully apply them under your natural nails, ensuring a snug fit. If using tips, apply a small amount of nail glue to the well of the tip and press it firmly onto your natural nail. Hold for a few seconds until the glue dries.
- Acrylic Application: Dip your acrylic brush into the liquid monomer, then into the acrylic powder, creating a small bead. Apply the bead to the area where the natural nail meets the form or tip, blending it seamlessly. Repeat this process, building up thin layers of acrylic until you achieve the desired thickness and shape.
- Shaping and Sculpting: Use your acrylic brush to shape and sculpt the acrylic while it’s still pliable. Pay close attention to the apex (the highest point of the nail), ensuring it’s properly positioned for strength and durability. Create a smooth and even surface, avoiding any bumps or ridges.
- Curing: Allow the acrylic to cure completely according to the manufacturer’s instructions. This usually takes several minutes. You can test the curing by tapping the nail with your brush; if it sounds solid, it’s ready.
- Filing and Buffing: Once the acrylic is cured, use a nail file to refine the shape and smooth any imperfections. Start with a coarse-grit file and gradually move to finer grits. Buff the surface of the acrylic to create a smooth and glossy finish.
- Finishing Touches: Apply a top coat to seal the acrylic and protect it from damage. You can also add nail art, such as polish, glitter, or decals, to personalize your manicure.
Addressing Common Application Issues
- Lifting: Lifting occurs when the acrylic separates from the natural nail. This can be caused by improper preparation, poor adhesion, or exposure to moisture. To prevent lifting, ensure you thoroughly dehydrate and prime your nails before applying the acrylic. Avoid getting water or oil under the acrylic.
- Bubbles: Bubbles in the acrylic can weaken the structure and create an uneven surface. To prevent bubbles, avoid overworking the acrylic and ensure your brush is clean and free of debris.
- Uneven Application: Uneven application can result in a lumpy or misshapen manicure. To achieve a smooth and even application, practice your technique and use thin, even layers of acrylic.
Product Recommendations for Acrylic Nails on Short Bitten Nails
Choosing the right products is essential for achieving a successful and long-lasting acrylic manicure on short, bitten nails. Here are some recommendations based on expert consensus and user reviews:
- Acrylic System: Young Nails Acrylic System, Mia Secret Acrylic System, or Valentino Beauty Pure Acrylic System. These brands are known for their high quality, easy workability, and excellent adhesion.
- Nail Forms: NSI Nail Forms or CND Nail Forms. These forms are durable and easy to use, providing a stable base for creating acrylic extensions.
- Nail Tips: Kiara Sky Short Coffin Tips or Apres Gel-X Short Natural Tips (can be used with acrylic). These tips are specifically designed for short nails and provide a natural-looking extension.
- Nail Dehydrator: OPI BondAid or CND ScrubFresh. These dehydrators effectively remove oil and moisture from the nail surface, promoting better adhesion.
- Nail Primer: Young Nails Protein Bond or Mia Secret Xtrabond Primer. These primers create a strong bond between the natural nail and the acrylic, preventing lifting.
- Acrylic Brush: Kolinsky Sable Acrylic Brush (Size 8 or 10). A high-quality brush is essential for precise acrylic application. Kolinsky sable brushes are known for their excellent absorbency and control.
- Nail File: 100/180 Grit Nail File. This file is ideal for shaping and refining acrylic nails.
- Buffer: 240/280 Grit Buffer. This buffer creates a smooth and glossy finish on acrylic nails.
Aftercare and Maintenance for Acrylic Nails on Short Bitten Nails
Proper aftercare and maintenance are crucial for extending the life of your acrylic manicure and preventing damage to your natural nails. Here are some essential tips:
- Moisturize Regularly: Apply cuticle oil to your cuticles and surrounding skin at least twice a day. This will help keep your skin hydrated and prevent dryness and cracking.
- Avoid Harsh Chemicals: Wear gloves when doing housework or working with harsh chemicals. These chemicals can damage the acrylic and dry out your skin.
- Don’t Pick or Bite: Resist the urge to pick or bite your acrylics. This can damage the acrylic and your natural nails.
- Schedule Regular Fill-Ins: Schedule regular fill-ins every 2-3 weeks to maintain the shape and strength of your acrylics. During a fill-in, your nail technician will fill in the gap between the acrylic and your cuticle as your natural nails grow out.
- Proper Removal: Never attempt to remove your acrylics yourself. This can severely damage your natural nails. Have them professionally removed by a qualified nail technician.
The Benefits of Acrylic Nails for Nail Biters: More Than Just Aesthetics
While the visual appeal of acrylic nails is undeniable, their benefits extend far beyond aesthetics for individuals struggling with nail biting. Here’s a closer look:
- Breaking the Habit: Acrylics provide a physical barrier that makes it difficult to bite your nails. The smooth, hard surface is less appealing to bite than natural nails.
- Protecting Natural Nails: Acrylics protect your natural nails from further damage caused by biting. This allows them to grow out and heal.
- Promoting Nail Growth: By preventing biting, acrylics allow your natural nails to grow longer and stronger.
- Boosting Confidence: Having well-manicured acrylics can significantly boost your confidence and self-esteem. You’ll feel more comfortable showing off your hands.
- Preventing Infections: Nail biting can increase the risk of infection. Acrylics create a barrier that protects your nails from bacteria and germs.
Addressing Common Concerns about Acrylic Nails on Short Bitten Nails
Many people have concerns about getting acrylic nails, especially if they have short, bitten nails. Let’s address some of the most common concerns:
- Will acrylics damage my natural nails? When applied and removed properly, acrylics should not cause significant damage to your natural nails. However, improper application or removal can weaken and thin the nails.
- Are acrylics painful to apply? The application process should not be painful. If you experience pain, inform your nail technician immediately. It could indicate an infection or other underlying nail problem.
- How long do acrylics last? Acrylics typically last for 2-3 weeks before requiring a fill-in. With proper aftercare, they can last even longer.
- Can I still do everyday tasks with acrylics? Yes, you can still perform most everyday tasks with acrylics. However, you may need to adjust your technique for certain activities, such as typing or opening cans.
- Are acrylics expensive? The cost of acrylics varies depending on the salon and the type of manicure you choose. However, they are generally more expensive than regular manicures.
Expert Q&A: Addressing Your Burning Questions About Acrylics on Bitten Nails
Here are some frequently asked questions, answered with expert insights:
- Q: My nail beds are so short; will acrylics even stay on?
A: Absolutely! With proper preparation, a skilled technician can securely apply acrylics, even to very short nail beds. They may use specialized techniques like sculpting directly onto the skin initially to create a base. - Q: How often should I get fill-ins when my nails are growing out from being bitten?
A: Initially, every 2 weeks is ideal. As your natural nails grow and strengthen, you can extend this to 3 weeks. Regular fill-ins maintain the structure and prevent lifting, which is crucial when encouraging nail growth. - Q: What shape is best for acrylics on short, bitten nails?
A: Rounded or oval shapes are generally recommended. They mimic the natural nail shape and provide more surface area for adhesion compared to square shapes, which can be prone to breakage on short nails. - Q: Can I use gel polish over acrylics on bitten nails?
A: Yes, gel polish works beautifully over acrylics! It adds extra shine and durability. Just ensure the technician properly preps the acrylic surface for optimal gel adhesion. - Q: What are the signs of a nail infection under acrylics, and what should I do?
A: Look for green or yellow discoloration, swelling, redness, or pain around the nail. If you notice any of these signs, immediately remove the acrylics (professionally is best) and consult a doctor or dermatologist. - Q: Are there any alternatives to acrylics for bitten nails?
A: Yes, gel extensions, builder gel, or even dip powder nails can be viable alternatives. Discuss these options with your nail technician to determine the best fit for your nail condition and lifestyle. - Q: How can I prevent my acrylics from lifting on short, bitten nails?
A: Meticulous preparation is key. Ensure your nails are thoroughly dehydrated and primed. Avoid prolonged exposure to water, and wear gloves when doing household chores. - Q: Is it possible to get acrylics if my cuticles are damaged from biting?
A: It’s best to allow your cuticles to heal as much as possible before getting acrylics. If they’re severely damaged, the technician may need to avoid the cuticle area during application to prevent further irritation. - Q: What length of acrylics is most practical for someone with short, bitten nails?
A: Start with a shorter length, gradually increasing it as your natural nails grow stronger. This will minimize the risk of breakage and allow you to adjust to the feeling of having longer nails. - Q: Can acrylics help me stop biting my nails for good?
A: While acrylics can be a great tool to break the habit, they’re not a guaranteed cure. Combine them with other strategies, such as stress management techniques and behavioral therapy, for the best results.
Conclusion: Embrace the Transformation with Acrylic Nails
Acrylic nails on short bitten nails are not only achievable but can be a transformative experience. By understanding the challenges, employing the right techniques, and prioritizing proper aftercare, you can achieve a stunning manicure that boosts your confidence and helps you break the nail-biting habit. Remember, patience and persistence are key. As your natural nails grow stronger and healthier, you’ll be amazed at the possibilities. So, take the plunge, embrace the transformation, and discover the beauty and confidence that acrylic nails can bring!
Share your experiences with acrylic nails on short bitten nails in the comments below! What tips and tricks have worked best for you? Let’s support each other on this journey to healthier, more beautiful nails.
